
Scripting an Audio manager
Unity have quite useful tools when it comes to managing things like audio and transitions between scenes. While these tools sure are useful, they are not always convenient. As I was about to implement sound effects in my teams current project, I decided to create my own audio manager and customize it to make sure that it was as convenient to use as possible.
The most common practice I came across when researching methods for implementing sounds were to simply create a script and then pass in a public AudioClip as a reference to be used in the script. While this method certainly works and is somewhat reusable, it simply did not make sense to me. Why have an object carry a script that forces it to both store and initialize an audioclip? This would mean that several objects of the same type would have to initialize their own audio files whenever they were created. This structure clearly needed some optimization, since initializing a lot of unessecary things is taxing on the system running the game.
Structure of the manager
The audio manager is made up by two different classes, the main class and the sub-class. I decided to use this structure since it would allow me to keep all the code in one script while still keeping said script as organized as possible.
Sub-class – Sound
The sub-class is the class responsible for storing the information provided by the user. This class registers the name, the audio file, the volume and the pitch of each registered audio clip. This class also contain two functions, one that sets the source of the file and one that plays the sound.
Main class – Manager
The main class of the manager is responsible for storing each audio clip registered in the sub-class. The manager does this by creating a list of the type “sound” based on the sub-class. The size of the list is dynamic since the length is determined by a public int that the user easily can change in the inspector of the engine. The manager itself only contain one function which plays specific sounds in the above mentioned list. The manager determines which sound should be played based on a string that the user feeds in while calling the function from another script.
How to use the manager
To use the manager the user first have to create an empty object that the script is attached to.
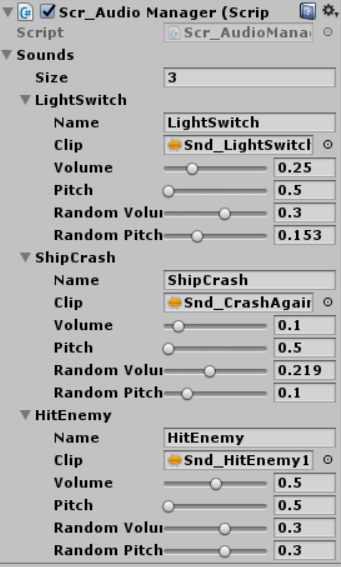
Once the object is created and the script is attached, the user can alter the amount of sounds that should be stored.
Once the amount is set the user simply drag and drop the audio files into the “clip” window and then give a name to said clip.
Further customization that allows the user to change the volume and pitch of each clip as well as variations to volume and pitch exists to give the user some more freedom to customize how the sounds sound in engine.
To play the sounds, the user simply cache one instance of the manager in the script that is supposed to play the sound.
//Cache manager

private Audiomanager aManager;

void Start()
{
   //Caching the manager
   aManager = AudioManager.instance;
}

void WhenCrash()
{
   aManager.PlaySound("ShipCrash");
}
Differences
So what is the difference between the method mentioned earlier and this custom manager?
Since the manager take care of storing and initializing the sounds provided by the user, the objects using said sounds do not have to. This means that the sounds only have to be initialized once instead of once per object, making it less taxing on the system running the application when several objects needs to be able to play the same sounds.
While making custom managers like this is not necessary, since most methods will suffice in smaller projects like the ones in this course, it is always an opportunity to learn something new that will be useful in larger projects.
/Jesper H. Backman
